The Stever
Active Member
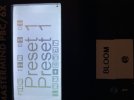
The Neuro Editor and the Neuro app shows the EQ is set to Channel 3.

And when I select EQ presets 1, 2, 3, etc in the Neuro desktop editor, it changes presets on the EQ device.The Neuro Editor and the Neuro app shows the EQ is set to Channel 3.
That's correct.I assume you are referring to changing it in devices page in the Editor. My understanding is the change only takes affect after transferring changes from the editor to the PBC?
I’m out of town all week. When I return I will send the file. I hope you and your family have a Happy Thanksgiving.Please send me your current settings file and I'll have a look.